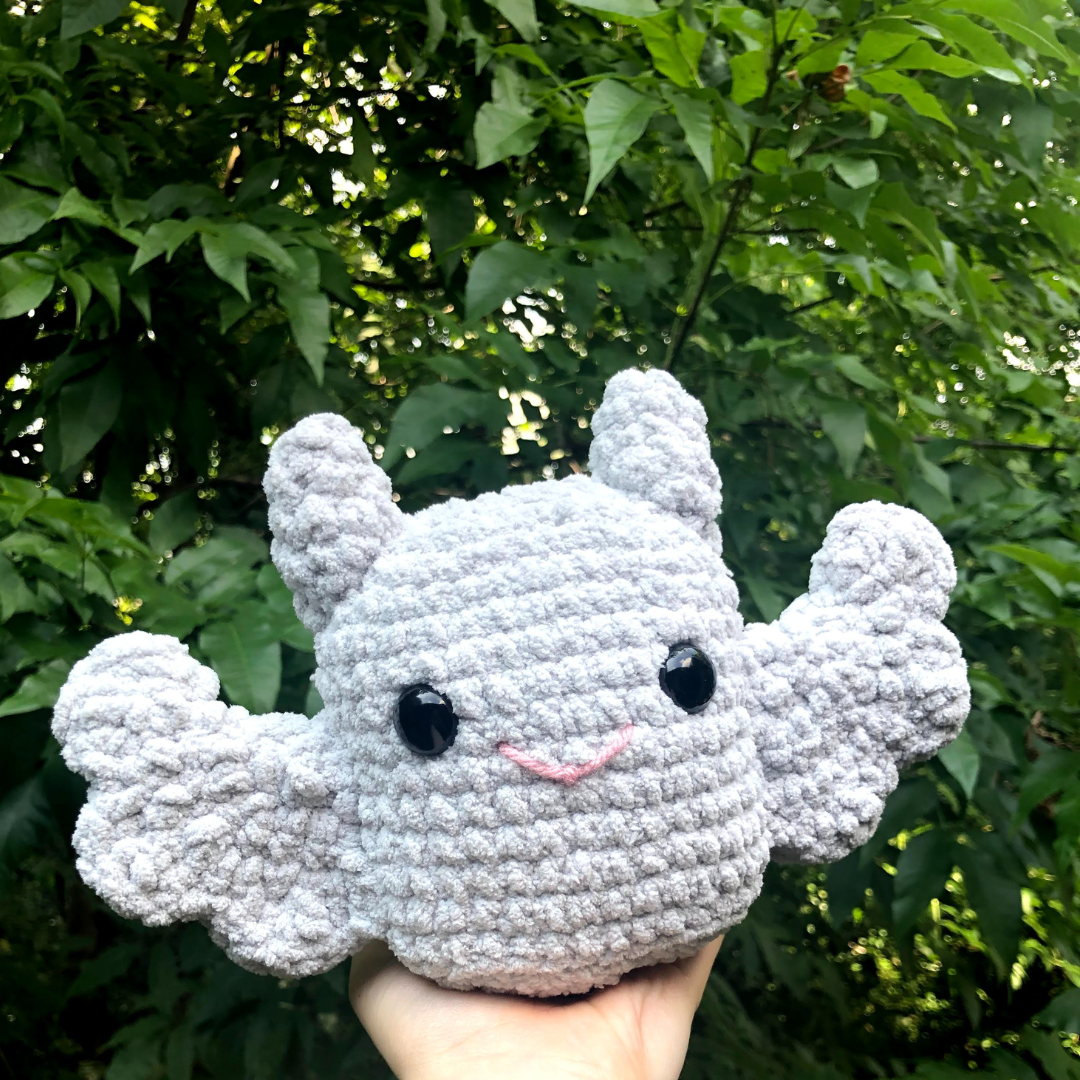
crochet by meredith
Luna the Bat
Crochet Plushie Pattern

Materials:
- Super bulky (size 6) yarn in gray
- Worsted weight (size 4) yarn in pink
- 18 mm safety eyes or worsted weight yarn in black to embroider eyes
- Size K (6.5 mm) crochet hook
- Fiberfill stuffing
- Yarn needle for sewing/embroidering
- Stitch market
Abbreviations:
- mr: magic ring
- st(s): stich(es)
- sc: single crochet
- sl st: slip stitch
- inc: increase (two in one stitch)
- dec: decrease (single crochet two together)
- hdc: half-double crochet
- dc: double crochet
- blo: back loop only
- []: repeat everything in the brackets the specified number of times
- FO: fasten off
Pattern Notes:
- This pattern is worked in continuous rounds. This means each round will not be joined with a slip stitch.
- You can find a paid PDF version of this pattern that includes reference pictures on my Etsy shop
- Pattern is for personal use only. Do NOT distribute this pattern OR any modified versions of this pattern.
- Finished products made from this pattern can be sold.
- Please tag me in pictures you post on Instagram (@crochetbymeredith) of your finished product! I’d love to see your work.
Pattern: Body
- Round 1: Ch 7, turn. Skip the first st., inc, 4 sc, 2 inc, 4 sc, 1 inc. (16)
- Round 2: 2 inc, 4 sc, 4 inc, 4 sc, 2 inc. (24)
- Round 3: 3 inc, 6 sc, 6 inc, 6 sc, 3 inc. (36)
- Round 4-15: Sc around (36)
- Round 16: In BLO, 3 dec, 6 sc, 6 dec, 6 sc, 3 dec. (24)
- Insert safety eyes or use worsted weight black yarn to embroider eyes between rows 8 & 9, about 6 stitches apart. Start stuffing the body.
- Round 17: 2 dec, 4 sc, 4 dec, 4 sc, 2 dec. (16)
- Finish stuffing the body
- Round 18: Dec around (8)
- Add a little bit more stuffing if necessary
- FO and weave in ends
Pattern: Wings (make 2)
- Round 1: 4 sc into a MR. Do not close the ring off. Ch. 1 and turn. Note the ch. 1 does not count as a stitch. (4)
- Round 2: Inc. around. Ch.1 and turn. (8)
- You will have a small semi-circle at this point rather than a full circle.
- Round 3: [sc, inc] x4. Ch. 1 and turn. (12)
- Round 4: [2sc, inc] x4. Ch. 1 and turn. (16)
- Round 5: [3 sc, inc] x4. Ch.1 and turn. (20)
- Round 6: 5 sc, 10 inc, 5 sc. Ch. 1 and turn. (30)
- Round 7: [sl st, hdc, dc 3x in one st, hdc, sl st] x6 (42)
- FO and leave a long tail for sewing the wings to the body.
- Assembly: Fold each wing in half. Note that there are 6 scallops that will match up perfectly when the wing is folded. Cut a new piece of yarn to sew the scalloped edges of the wings together. Weave in both ends of the yarn. Do not stuff the wings and leave the flat edge open to be sewn to the body of the bat later.
Pattern: Ears (make 2)
- Round 1: 6 sc into MR (6)
- Round 2: sc around (6)
- Round 3: [sc, inc] x3 (9)
- Round 4: [2 sc, inc] x3 (12)
- Round 5: Dec around (6)
- FO and leave a long tail for sewing. Do not stuff the ears.
Assembly
- Sew the wings to either side of the body. The bottom of the wings should be in line with row 14 and the top will be in line with row 8, right where the top of the eyes (safety or embroidered) are. The wings should be about 3 stitches back from the outer edge of the eyes.
- Sew the ears on either side of the top of the body. The narrow edges of the ears should face forward, towards you. Line the front of the ears up with row 2 and sew them onto the body facing each other. Line the back of the ear up with the edge of the body (around row 4) and sew it on.
- Use the pink worsted weight yarn to add a smile. The smile should be placed between the eyes, with the top edges falling between rows 9 & 10 and the bottom edges falling between rows 10 & 11.

